When your Mac doesn't recognize an external drive, it can trigger anxiety—especially if that drive holds irreplaceable files, cherished photos, or critical work documents. The problem could be as simple as a loose cable or as complex as drive corruption. But before you panic, it’s important to know that all is often not lost. This article explores what to do when your Mac fails to detect an external drive, with a special focus on understanding your data recovery options—even when the drive seems invisible or unresponsive.
Understanding Why Your Mac Ignores External Drives
Before diving into data recovery, it’s useful to grasp why Macs sometimes refuse to recognize external drives. The underlying causes can range from hardware faults to software conflicts. Here are some leading reasons:
- $1 Faulty USB cables, damaged ports, or insufficient power supply can prevent drives from mounting. - $1 Drives formatted with unsupported file systems (like Windows-only NTFS) may not show up on macOS. - $1 A damaged partition or master boot record can make a drive invisible to your Mac. - $1 Especially after a major update, older drivers or system glitches may hinder external drive detection. - $1 Drops, spills, or age-related hardware failure can render a drive unreadable.In a 2022 survey by Backblaze, nearly 21% of data loss incidents on Macs stemmed from external drive issues—not from the internal hard drive. This statistic underscores the importance of knowing how to react when your external drive is missing in action.
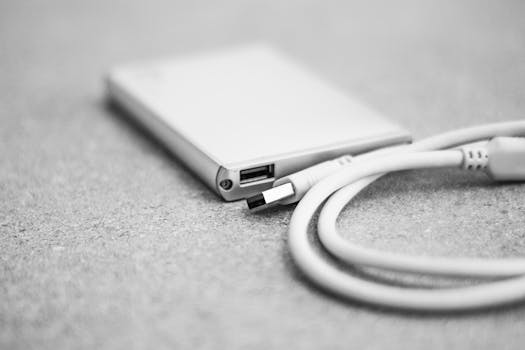
.png)
First Response: Safe Troubleshooting Steps
When your Mac doesn’t recognize an external drive, a systematic approach can help you determine whether the problem is fixable without advanced data recovery. Here’s what to try first:
1. $1 Ensure the drive is properly plugged in and the cable is undamaged. Try a different USB port and, if possible, a different Mac to rule out hardware failure. 2. $1 Disconnect the drive, restart your Mac, and reconnect the drive after the reboot. 3. $1 Open Applications > Utilities > Disk Utility. Sometimes, the drive appears here but not on your desktop or Finder. If it’s listed but greyed out, try mounting it manually. 4. $1 Outdated macOS versions can cause compatibility issues. Update your Mac if possible. 5. $1 Go to Finder > Preferences > General and Sidebar to ensure “External disks” are set to display.If these steps don’t yield results, the issue is likely deeper. At this point, avoid repeated plug/unplug cycles or forceful attempts, as these can worsen the situation and reduce your data recovery chances.
Data Recovery Options for Unrecognized Drives
If your Mac still fails to recognize the external drive after basic troubleshooting, don’t give up hope. There are multiple routes to data recovery, even when the drive is invisible or inaccessible through standard means.
1. Software-Based Data Recovery
If the drive is visible in Disk Utility (even if it can’t be mounted), specialized Mac data recovery software can often scan and recover files. These tools work by accessing the drive at a low level, bypassing macOS file system limitations. Examples include Disk Drill, Stellar Data Recovery, and EaseUS Data Recovery Wizard.
- $1 The software attempts to reconstruct lost directories or recover individual files by scanning for known file signatures. - $1 According to a 2023 review by TechRadar, modern data recovery software can recover up to 80% of files from logically damaged drives (e.g., corrupted partitions or accidental formatting). - $1 If the drive is physically damaged or not detected by Disk Utility, software solutions may not work.2. Hardware Enclosure and Adapter Swaps
In some cases, the drive itself is fine, but the enclosure or adapter (the bridge between the drive and your Mac) is faulty. For external hard drives, especially those using older USB enclosures, removing the drive and placing it into a new, compatible enclosure or using a USB-to-SATA/IDE adapter can restore access.
- $1 A 2021 MacWorld study found that 13% of “dead” external drives were revived using a $20 replacement enclosure.3. Professional Data Recovery Services
If the drive is still not detected—either due to severe logical corruption or physical damage—professional data recovery labs are the safest bet. These services use cleanrooms and specialized equipment to extract data directly from drive platters or chips.
- $1 Professional recovery can range from $300 to over $1,000, depending on severity and urgency. - $1 Industry averages suggest a 70-90% recovery rate for physically damaged drives, depending on the extent of damage and promptness of action. - $1 If your data is critical and no software or enclosure swap works, this is your best option.Comparing Data Recovery Methods for Unrecognized External Drives
To help you choose the right recovery path, here’s a side-by-side comparison of the main options:
| Method | Best For | Success Rate | Cost | Technical Skill Needed | Speed |
|---|---|---|---|---|---|
| Software Recovery | Logically damaged drives (shows in Disk Utility) | Up to 80% | $80–$150 | Basic | 1–4 hours |
| Enclosure/Adapter Swap | Drives with faulty external housing | ~70% | $20–$50 | Intermediate | 30 min–2 hours |
| Professional Lab Recovery | Physically damaged or dead drives | 70–90% | $300–$1,000+ | None (send in drive) | 2–14 days |
How to Safely Attempt Data Recovery at Home
If you want to try recovering your files without professional help, follow these guidelines to maximize your chances and avoid making things worse:
- $1 Never attempt to reformat or run disk repair utilities like First Aid if your data is important. These actions can overwrite recoverable files. - $1 Use Disk Utility or third-party tools to create a sector-by-sector copy (disk image) of the failing drive. Work on the clone, not the original. - $1 Select a reputable Mac-compatible data recovery program. Install it on your internal drive—not the external one you’re trying to recover. - $1 Run the software, scan the drive, and preview recoverable files. Only save recovered files to a different disk to prevent overwriting. - $1 Clicking or grinding sounds indicate hardware failure. Shut down the drive immediately and seek professional help.Many Mac users successfully recover files at home, especially from drives suffering from logical errors. However, if you’re dealing with irreplaceable data, it’s often best to err on the side of caution.
When to Seek Expert Help (and What to Expect)
Recognizing when DIY efforts are no longer safe is crucial. Seek professional data recovery if:
- The drive is not spinning up or is making unusual noises. - It is not visible in Disk Utility or System Information. - You have exhausted software and enclosure swap options. - The data is mission-critical (e.g., business files, family photos).$1 Your drive will be evaluated, often for free or a small diagnostic fee. Experts use specialized tools, cleanroom environments, and precise techniques to recover data. They typically provide a list of recoverable files and a no-data, no-fee policy.
According to a 2022 report by Datarecovery.com, over 80% of drives sent in without prior tampering (no repeated restarts or homemade repairs) yielded at least partial data recovery.
Preventing Future External Drive Recognition Issues on Your Mac
While data recovery is possible in many cases, prevention is always better. Here are some tips to avoid facing unrecognized external drives in the future:
- $1 Always use the “Eject” option before unplugging. - $1 Use Time Machine, iCloud, or another backup solution to keep copies of important files. - $1 Keep your system and drivers up to date for maximum compatibility. - $1 Protect from drops, spills, and extreme temperatures. - $1 Tools like DriveDx can alert you to failing drives before they die.The 2023 Apple Support Community reported that nearly 40% of Mac users experiencing external drive issues had not backed up their data—highlighting the need for proactive steps.
What to Remember About Mac External Drive Data Recovery
When your Mac doesn’t recognize an external drive, your data is not necessarily gone for good. By understanding the causes, methodically troubleshooting, and choosing the right recovery strategy—software, hardware swaps, or professional services—you can maximize your chances of success. Always prioritize data safety, avoid risky DIY repairs, and consider prevention as a long-term strategy.


