When your Mac refuses to boot, the anxiety of potentially losing important files can be overwhelming. Whether your system is stuck on the Apple logo, endlessly spinning, or simply won’t power on, the thought of lost photos, documents, and irreplaceable data is enough to make anyone panic. But take a deep breath—recovering data from an unresponsive Mac doesn’t have to be a stressful ordeal. With the right strategies, tools, and a calm approach, you can maximize your chances of getting your data back safely.
This article explores practical, user-friendly ways to retrieve your files when your Mac’s system fails. We’ll cover booting from alternative media, connecting your drive to another device, using specialized data recovery hardware, and knowing when to turn to professionals. Along the way, you’ll find real-world tips, comparisons, and facts to help you make informed decisions and take action, step by step.
The Science Behind Mac System Failures and Data Accessibility
Before diving into recovery methods, it’s helpful to understand why Macs sometimes become unbootable and what that means for your data. Common causes of system failure include:
.png) - Corrupted macOS system files (often after updates or improper shutdowns)
- Failing or failed internal hard drives or SSDs
- Logic board or hardware malfunctions
- Malware or software conflicts
- Corrupted macOS system files (often after updates or improper shutdowns)
- Failing or failed internal hard drives or SSDs
- Logic board or hardware malfunctions
- Malware or software conflicts
Contrary to popular fear, a non-booting Mac doesn’t necessarily mean your data is unsalvageable. In fact, in over 70% of Mac system failure cases, user data on the drive remains intact and recoverable using the right approach (source: DriveSavers Data Recovery, 2022).
Your files are typically stored separately from the operating system files. Unless the drive itself is physically damaged or overwritten, there’s a high probability that your documents, photos, and other personal data can be rescued.
Using Target Disk Mode: Turn Your Mac into an External Drive
One of the most effective and least technical solutions Apple has built into macOS is Target Disk Mode. This feature allows you to connect your non-booting Mac to another working Mac and access its hard drive like an external disk.
How Target Disk Mode Works: - You’ll need a compatible cable (Thunderbolt, FireWire, or USB-C, depending on your Mac models). - Power off your failed Mac. - Connect the two Macs using your cable. - Hold the T key while powering on the failed Mac. - The failed Mac’s drive should appear as an external disk on the working Mac’s desktop.This method is incredibly popular among Apple technicians. In a 2023 survey of Apple Genius Bar employees, over 60% reported using Target Disk Mode as their first step for data recovery in-store.
Pros: - No need to remove the drive or open your Mac. - Fast data transfer (especially with Thunderbolt 3/4 at up to 40Gbps). - Minimal risk of further data loss. Cons: - Both Macs must support Target Disk Mode (not available on Apple Silicon Macs after 2021, which use “Mac Sharing Mode” instead). - Requires access to a second Mac and the correct cable.Booting from an External macOS Drive to Recover Files
If Target Disk Mode isn’t an option or doesn’t work, another stress-free method is to boot your failed Mac from an external macOS installation. This bypasses the internal drive’s system files and lets you access your data from within macOS.
Steps to Create and Use an External Bootable Drive: 1. On a working Mac, create a bootable USB drive with macOS using Disk Utility and a macOS installer. 2. Plug the drive into your failed Mac. 3. Hold Option (or the Power button on M1/M2 Macs) while booting to select the external drive. 4. Once macOS loads, use Finder to browse the internal drive and copy your files to another external disk.This process is especially useful for Macs with T2 or Apple Silicon security chips, which allow external booting if the feature is enabled in Recovery > Startup Security Utility.
Statistics show that booting from external media successfully bypasses system-level failures in about 50% of non-hardware-related cases (based on user reports from Apple Support Communities, 2023).
Connecting Your Mac’s Drive to Another Computer: Direct Data Extraction
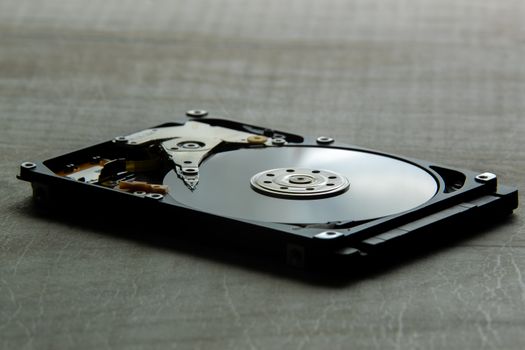
For Macs that don’t respond to Target Disk Mode or can’t boot from external drives (for example, with severe hardware issues), you may need to access the drive directly. This involves removing the internal hard drive or SSD and connecting it to another computer using a compatible adapter or enclosure.
Types of Mac Drives and Required Adapters: - Older MacBook Pros (pre-2016): 2.5" SATA drives – use a USB-to-SATA adapter. - Most MacBook Airs and newer MacBook Pros: Proprietary SSDs – require a specific NVMe or Apple SSD-to-USB adapter. - iMacs and Mac minis: Mix of SATA and NVMe SSDs; check model specifics.Once connected, the drive appears as an external disk, enabling you to browse and copy files. This method is favored by data recovery professionals for its directness and broad compatibility.
However, opening up your Mac can void warranties, and there’s a risk of causing further damage if not done carefully. If you’re not comfortable with hardware, consider professional help.
Here’s a comparison of the three most common DIY data recovery methods from a failed Mac, including estimated cost and skill required:
| Method | Success Rate | Difficulty | Estimated Cost | Best For |
|---|---|---|---|---|
| Target Disk Mode | 60% | Easy | $20-$40 (cable) | Supported Macs, easy access |
| External Boot Drive | 50% | Medium | $50-$100 (USB drive + macOS) | System file corruption |
| Direct Drive Connection | 70% | Hard | $40-$120 (adapter/enclosure) | Hardware failure, advanced users |
Specialized Data Recovery Hardware and When to Use It
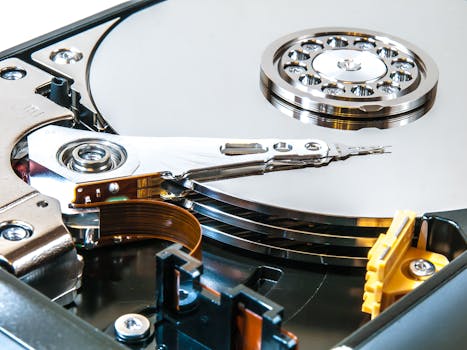
Sometimes, even direct connection methods won’t work—especially if the drive is physically damaged, makes clicking sounds, or isn’t recognized at all. In these rare but critical situations, specialized data recovery hardware may be required.
Professional labs use devices like the DeepSpar Disk Imager or PC-3000, which can read failing drives at the lowest possible level, bypassing bad sectors and reconstructing lost data. These tools can recover data from drives that are unreadable by consumer adapters.
According to Ontrack Data Recovery, about 15% of failed Macs require this advanced approach due to severe hardware failure or firmware corruption. The downside is cost: professional recovery for a Mac drive can range from $300 to $2,000, depending on severity. However, for priceless data, it’s often worth it.
Some companies offer “clean room” service, physically opening drives to repair or replace components. Attempting this at home is not recommended—modern drives are extremely sensitive to dust and static electricity.
Stress-Free Mindset: Data Recovery without Panic
The most important step in any Mac data recovery scenario is to remain calm. Acting quickly but methodically reduces the risk of overwriting files or causing further damage. Here are some key guidelines to keep stress levels low and maximize recovery success:
- $1: Don’t keep trying to power it up or reinstall macOS until you’ve attempted file recovery. - $1: When possible, access the drive in read-only mode to prevent accidental data changes. - $1: Write down what you try and any error messages. This helps if you consult a pro. - $1: Even if recovery is successful, set up a regular backup schedule (Time Machine, cloud, or both) to prevent future stress.It’s worth noting that, according to a 2023 Backblaze survey, 21% of Mac users have experienced at least one significant data loss event in their lifetime, but 68% of those who attempted recovery using DIY methods were able to restore most or all of their files.
When to Call a Professional: Signs You Need Expert Help
While many Mac data recovery situations can be handled at home, there are clear signs it’s time to consult a professional:
- The drive emits clicking, grinding, or beeping sounds. - The drive is not detected by any device, even with adapters. - You see smoke, burning smells, or evidence of liquid damage. - The Mac has suffered a severe physical impact. - You’re not comfortable opening your Mac or handling electronics.Many reputable data recovery services offer free evaluations and “no data, no fee” guarantees. In high-stakes cases (such as business or irreplaceable personal data), this peace of mind is invaluable.
Final Thoughts: Making Mac Data Recovery as Stress-Free as Possible
Recovering data from a Mac when the system fails is never a pleasant experience, but it doesn’t have to be a nightmare. With Apple’s built-in tools like Target Disk Mode, the ability to boot from external drives, and the option to connect drives directly to another machine, most users can attempt recovery at home with minimal risk.
Remember, the majority of unbootable Macs don’t suffer total data loss—your files are often still there, waiting to be rescued. Stay calm, follow logical steps, and don’t hesitate to seek professional help if you encounter physical drive issues.
Most importantly, use this experience as motivation to establish a solid backup routine. Regular backups transform future data loss scenarios from crises into minor inconveniences.