Losing valuable files on your Mac can be a nerve-wracking experience. Whether due to accidental deletion, drive failure, or software errors, the urge to recover data quickly can lead to critical mistakes that make recovery harder—or even impossible. Surprisingly, many users, from beginners to experienced Mac owners, fall into the same traps when trying to rescue their data. Understanding these common mistakes in data recovery on Mac systems—and knowing how to avoid them—can dramatically improve your chances of a successful recovery and prevent further data loss.
The High Stakes of Mac Data Recovery: Why Caution Matters
Data loss in the macOS environment is more common than many realize. According to a 2023 industry report from Kroll Ontrack, nearly 30% of Mac users experience some form of data loss annually. With the average cost of lost data for individuals and small businesses estimated at over $1,200 per incident, the stakes are high. Yet, in their haste, many users inadvertently make errors that complicate or even prevent file recovery.
Unlike Windows, macOS handles file deletion and disk management differently, making some mistakes particularly costly. For example, the APFS file system, introduced in macOS High Sierra, has unique behaviors that can either help or hinder recovery depending on how users respond after data loss. Recognizing the most frequent pitfalls is the first step to safeguarding your data and making informed choices when disaster strikes.
.png)
Overwriting Lost Data: The Most Costly Mistake
One of the most common—and irreversible—mistakes Mac users make after losing files is continuing to use the affected drive. When you delete a file on macOS, the operating system marks the space as available for new data but does not immediately erase the file. However, any new data written to the drive may overwrite the deleted files, making recovery extremely difficult or even impossible.
For example, if you realize you’ve deleted an important document from your Desktop and immediately download a large file or install a new application, you risk overwriting the very data you hope to recover. This is especially problematic with solid-state drives (SSDs), which often use TRIM commands to immediately erase deleted data, reducing the recovery window to mere minutes.
To avoid this mistake: - As soon as you notice data loss, stop using the affected drive. - Do not download or install recovery software on the same drive. - If possible, physically disconnect the drive and connect it to another Mac as a secondary disk for recovery.Relying on Unsuitable Recovery Software
The Mac App Store and the wider internet are filled with data recovery tools, but not all are created equal. In fact, using the wrong software can decrease your chances of successful recovery, especially on newer Macs with APFS volumes or T2/M1/M2 security chips.
Key points to watch for include: - Compatibility: Some popular recovery tools do not fully support APFS or encrypted drives. - Read/Write Operations: Many free or low-quality tools write temporary files to the drive being recovered, which can overwrite lost data. - Security: Downloading software from unverified sources increases the risk of malware, further jeopardizing your files.A 2022 user survey by Macworld found that nearly 40% of failed recovery attempts were due to software incompatibility or improper use of recovery tools.
To avoid software-related mistakes: - Choose reputable, Mac-specific recovery tools such as Disk Drill, Stellar Data Recovery, or Prosoft Data Rescue. - Always download software directly from the vendor’s official website. - Use a different, healthy drive for installation and recovery when possible.Ignoring Disk Health and Physical Issues
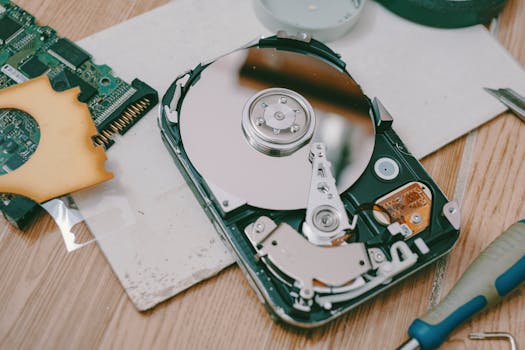
Data loss is not always the result of accidental deletion. Hardware failures—including bad sectors, failing SSDs, or malfunctioning USB ports—can cause files to become inaccessible. A common mistake is to run repeated recovery attempts or disk repair tools on a physically failing drive, which can accelerate its demise.
According to Backblaze’s 2023 Hard Drive Stats, about 1.4% of hard drives fail each year, with older drives and those exposed to physical shock at even higher risk. SSDs, while more robust, can still experience sudden failures due to controller issues or firmware bugs.
Avoid aggravating drive problems by: - Listening for unusual noises (clicking, grinding) and immediately powering down the drive if detected. - Checking disk health with built-in Mac tools like Disk Utility’s S.M.A.R.T. status or third-party apps. - Contacting a professional data recovery service if hardware failure is suspected, rather than attempting DIY recovery.Misunderstanding File System Differences
Modern Macs use several file systems: APFS, HFS+, and occasionally exFAT or FAT32 for external drives. Each file system has distinct characteristics that impact how data is stored, deleted, and recovered.
For example, APFS is optimized for SSDs and supports features like snapshots and cloning, but it also handles data deletion differently than HFS+. Users who attempt recovery with tools designed for HFS+ may find them ineffective on APFS volumes, particularly if encryption or Time Machine snapshots are involved.
Below is a comparison of common Mac file systems and their recovery implications:
| File System | Typical Use | Recovery Difficulty | Encryption Support |
|---|---|---|---|
| APFS | macOS High Sierra and later, SSDs | High (esp. if encrypted & with TRIM enabled) | Yes (native) |
| HFS+ | Older Macs, HDDs | Moderate | Yes (FileVault 2) |
| exFAT/FAT32 | External drives, cross-platform | Low | No |
Overlooking Backups and Snapshots
In a panic, many users forget to check for existing backups or available macOS snapshots before attempting risky recovery operations. Time Machine, iCloud Drive, and APFS snapshots can all offer easier, safer recovery options—if you know to look for them.
According to Apple, more than 50% of Mac users enable Time Machine, yet a significant number fail to regularly check or test their backups. Similarly, APFS volumes often contain invisible snapshots that allow for restoration to previous states, but these are frequently ignored during recovery attempts.
To make the most of backup and snapshot features: - Check your Time Machine and iCloud backups before using any data recovery software. - Use the Terminal command "tmutil listlocalsnapshots /" to see available APFS snapshots. - Restore from backups or snapshots before attempting file carving or deep scans.Best Practices for Successful Mac Data Recovery
Avoiding common mistakes is only half the battle. Following these best practices maximizes your chances of a full and safe recovery:
1. Act Quickly but Cautiously: The sooner you attempt recovery, the better—but never rush into using the affected drive or untrusted tools. 2. Always Work from a Clone: Create a sector-by-sector clone of the affected drive using tools like Carbon Copy Cloner or ddrescue, and perform recovery attempts on the clone, not the original. 3. Keep Backups Up to Date: Regularly test Time Machine and iCloud backups to ensure they’re working. 4. Document Your Actions: Keep a log of what you’ve tried—this helps professionals if you later seek expert help. 5. Seek Professional Help Early: For hardware failures or mission-critical data, contact certified Mac data recovery specialists before attempting DIY fixes.Final Thoughts on Avoiding Mac Data Recovery Mistakes
While the urge to recover lost data quickly is understandable, it’s crucial to avoid hasty decisions that could make matters worse. By understanding the unique pitfalls of Mac data recovery—such as overwriting, using incompatible software, ignoring drive health, and misunderstanding file systems—you can protect your files and improve your odds of a successful recovery. Remember: the right steps at the right time make all the difference. When in doubt, consult a professional before taking risks with irreplaceable data.