Recovering Data from an Old Mac Hard Drive: Essential Tips and What You Need to Know
If you’ve ever pulled an aging Mac out of the closet only to find the hard drive won’t boot, you’re not alone. With Apple devices lasting for years, many users eventually face the challenge of recovering files from an old Mac hard drive. Whether it’s precious photos, irreplaceable documents, or years of work, the data on those drives can be extremely valuable. Fortunately, with the right approach and a bit of know-how, it’s often possible to recover much—if not all—of your lost files. This guide will walk you through the key steps, tools, and considerations for safely recovering data from an old Mac hard drive, plus explain the options available depending on your situation.
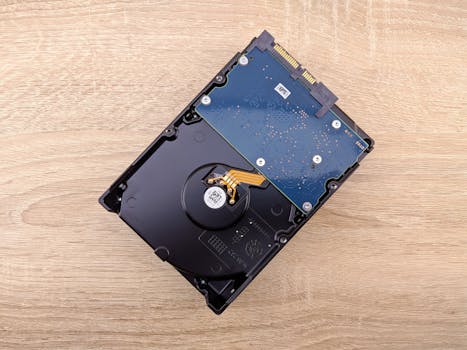
Understanding the Challenges of Old Mac Hard Drives
Old Mac hard drives present unique challenges when it comes to data recovery. Unlike newer solid-state drives (SSDs), traditional hard disk drives (HDDs) use moving parts, which are vulnerable to wear and tear. Over time, factors such as physical degradation, corrupted file systems, outdated interfaces (like IDE or FireWire), and obsolete macOS formats like HFS+ can complicate recovery efforts.
.png)
According to a 2023 Backblaze report, mechanical hard drives have an average annual failure rate of 1.37%, but this rate increases dramatically after five years of use. Drives manufactured before 2012 are particularly at risk, as they may no longer be supported by modern Mac computers, and the risk of hardware failure grows each year.
Moreover, Apple’s transition from Intel to Apple Silicon chips and the phasing out of legacy ports (FireWire, Thunderbolt 1/2) make connecting old drives to current Macs more difficult. Understanding these challenges is the first step toward successful data recovery.
Choosing the Right Connection Method: Adapters, Enclosures, and Docks
One of the biggest hurdles in retrieving data from an old Mac hard drive is physically connecting it to a modern computer. Drives from older Macs may use interfaces such as SATA, IDE (also called PATA), FireWire, or even SCSI. Here’s what you need to know:
- SATA Drives: Most Macs made after 2006 use SATA hard drives. These can be connected to a modern Mac or PC using a SATA-to-USB adapter, external enclosure, or docking station. Adapters cost as little as $15, while enclosures range from $20 to $50. - IDE/PATA Drives: Macs from the early 2000s may use IDE drives. To access these, you’ll need an IDE-to-USB adapter, which typically costs $20–$30. - FireWire Drives: Some external drives and older MacBooks/iMacs use FireWire. While modern Macs lack FireWire ports, you can use a FireWire-to-Thunderbolt adapter (about $30) and a Thunderbolt-to-USB-C adapter if necessary. - SCSI Drives: Rare in Macs after the 1990s, SCSI drives require specialized adapters—these are harder to find and can cost over $100.Here’s a quick comparison of connection methods:
| Drive Type | Common Macs | Adapter Needed | Approximate Cost | Compatibility |
|---|---|---|---|---|
| SATA | iMac (2006-2012), MacBook Pro (2006-2015) | SATA-to-USB | $15–$50 | High |
| IDE/PATA | iMac G3/G4, Power Mac G4 | IDE-to-USB | $20–$30 | Medium |
| FireWire | iMac (1999–2011), Power Mac G4/G5 | FireWire-to-Thunderbolt, Thunderbolt-to-USB-C | $30–$60 | Low to Medium |
| SCSI | Pre-1999 Macs | SCSI-to-USB | $100+ | Low |
Always check your drive’s label or your Mac’s model/year to determine the right connection method. Adapters and enclosures are available on Amazon, OWC, and specialist electronics retailers.
File System Compatibility: Accessing HFS+, APFS, and Beyond
Another obstacle in recovering data from old Mac drives is file system compatibility. Apple has used several file systems over the years:
- HFS (Hierarchical File System): Used in classic Macs prior to 1998. - HFS+ (Mac OS Extended): Used from 1998 to 2017. - APFS (Apple File System): Introduced in 2017 for macOS High Sierra and newer.If you connect an old Mac hard drive to a modern Mac, recent versions of macOS can usually read HFS+ and APFS drives natively. However, if you’re using a Windows PC or Linux machine, you’ll need special software to access these Mac file systems.
For Windows: - HFSExplorer (free, read-only) - Paragon HFS+ for Windows ($20, read/write) - MacDrive 10 ($49.99, read/write) For Linux: - Most distributions can mount HFS+ drives with the “hfsplus” package, but APFS support is experimental.If your drive uses HFS (classic Mac), you may need to use an old Mac with compatible software or explore emulators like Basilisk II.
It’s important to note that APFS drives encrypted with FileVault cannot be accessed without the original password. If you’re uncertain about the file system, connect the drive and check its format using Disk Utility (macOS) or Disk Management (Windows).
Safe Data Recovery Practices: Protecting Your Old Drive
When working with an old hard drive, minimizing risk is vital. Older drives may have mechanical issues, and every attempt to read data can worsen damage. Here are expert-approved best practices:
1. $1: Never save new files or install software on the old drive. This prevents overwriting potentially recoverable data. 2. $1: Exposing the internals of a hard drive to dust can cause further damage. If you must open an enclosure, do so in a clean environment. 3. $1: Use software such as Disk Utility (macOS), dd (Linux/Unix), or Clonezilla (cross-platform) to make a bit-by-bit image of the drive. This allows you to recover data from the image, not the failing hardware. 4. $1: Clicking noises, repeated disconnections, or unusual heat are red flags. If you notice these, stop using the drive and seek professional help.According to DriveSavers, a leading data recovery company, up to 80% of data recovery failures from old drives are caused by continued use after initial failure symptoms. Always err on the side of caution.
Software Solutions for Mac Data Recovery
Once you’ve safely connected your drive and created an image, data recovery software can help you retrieve files—even those deleted or lost due to corruption. Here are some top-rated options for Mac data recovery:
- Disk Drill (CleverFiles): Supports HFS+, APFS, and can recover deleted files, partitions, and more. Free to preview files, $89 for full recovery. - Data Rescue (Prosoft Engineering): Well-regarded for deep scan capabilities and supports imaging. Starts at $99. - Stellar Data Recovery: Known for user-friendly interface and compatibility. Free version recovers up to 1GB, paid versions start at $59.99. - PhotoRec/TestDisk: Open-source, supports many formats but has a less intuitive interface. Free.These programs vary in ease of use, supported formats, and cost. Here’s a quick comparison:
| Software | Price | Supported Formats | Key Features |
|---|---|---|---|
| Disk Drill | $89 | APFS, HFS+, FAT, NTFS | Deep scan, partition recovery, preview |
| Data Rescue | $99 | APFS, HFS+, exFAT, NTFS | Cloning, deep scan, file preview |
| Stellar Data Recovery | $59.99+ | APFS, HFS+, NTFS, exFAT | Quick/deep scan, file sorting |
| PhotoRec/TestDisk | Free | APFS, HFS+, FAT, NTFS, ext | File carving, partition repair |
Always try the free or demo version first to see if your files are recoverable before purchasing.
When to Call a Professional Data Recovery Service
DIY data recovery isn’t always possible. If your Mac hard drive has suffered physical damage (e.g., it’s been dropped, emits clicking noises, or isn’t recognized at all), specialized equipment and a clean room environment may be required.
Professional data recovery services—like DriveSavers, Secure Data Recovery, or Ontrack—can handle severe cases, but costs can range from $300 for logical recovery to over $1,500 for physical repairs. According to a 2022 report by Ontrack, about 70% of drives can be partially or fully recovered by professionals, even if they are years old.
Signs you need a pro: - Drive isn’t spinning or is making unusual noises - Burning smell or obvious physical damage - The drive is not detected at all by any computer or adapter - DIY attempts have failed or made things worseAlways get a quote before sending in your drive, and check reviews to ensure you’re working with a reputable company.
Final Steps: Preserving Recovered Data and Future-Proofing
Once you’ve successfully recovered your files, it’s essential to safeguard them against future loss. Consider these best practices:
- Store recovered data in multiple locations, such as an external SSD, cloud storage (like iCloud or Dropbox), or another Mac. - Regularly back up your Mac using Time Machine or third-party backup solutions. - If you plan to access files on modern Macs, consider reformatting the recovered drive to APFS or exFAT for broader compatibility. - Label and safely store the old hard drive, just in case further recovery is needed later.According to Statista, 31% of data loss incidents are caused by hardware failure, but a further 29% are due to accidental deletion or formatting. Prevent future headaches by backing up early and often.


