Backing up your Mac before a hard drive restoration isn’t just a smart move—it’s absolutely essential. Whether you’re facing a looming drive failure, planning a fresh macOS installation, or preparing for a full hardware upgrade, the risk of losing irreplaceable files is real. Photos, documents, emails, and application data can vanish in moments if you don’t have a secure backup. Yet, many Mac users are unsure about the right way to back up data, what methods are safest, and what steps to take to ensure nothing gets left behind.
This guide explores how to properly back up data on a Mac before hard drive restoration. We’ll cover the pros and cons of different backup methods, practical steps for comprehensive protection, and key mistakes to avoid. You’ll also find a comparison table of popular backup solutions and answers to common questions about preparing your Mac for restoration.
Why Backing Up Your Mac Before Restoration Is Critical
Restoring or replacing your Mac’s hard drive is a process that can erase every file on your machine. According to a 2023 survey by Backblaze, nearly 29% of computer users have lost data due to not backing up regularly. Data loss isn’t just an inconvenience—it can mean the permanent disappearance of years’ worth of work, memories, and important documents.
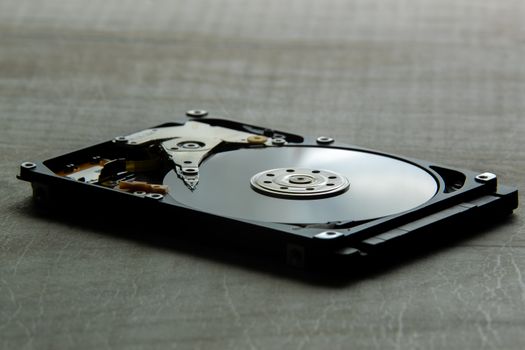
.png)
Unlike routine backups, preparing for hard drive restoration demands a more meticulous approach. System files, application data, user settings, and hidden folders may not be preserved by simple file copies. Failing to back up properly can result in:
- Loss of personal documents, photos, and videos - Missing application preferences or licenses - Inaccessible emails and contacts - Loss of browser bookmarks and saved passwordsA holistic, well-planned backup ensures your transition through hard drive restoration is smooth and stress-free, with nothing left behind.
Understanding Backup Methods for Mac: Local, Cloud, and Hybrid Solutions
Mac users have a range of backup options, each with unique advantages and limitations. The three main methods are local backups (such as Time Machine), cloud backups (like iCloud or third-party services), and hybrid approaches that combine both. Here’s how they stack up:
| Backup Method | Pros | Cons | Best For |
|---|---|---|---|
| Time Machine (Local) | Automatic, full-system backups; easy to restore; included with macOS | Requires external drive; vulnerable to physical theft or damage | Home users; fast on-site recovery |
| iCloud Drive | Syncs documents and desktop; accessible anywhere; easy to use | Limited free storage (5 GB); not full-system; slow for large files | Light users; document and photo sync |
| Third-Party Cloud (e.g., Backblaze, Carbonite) | Automatic offsite backups; unlimited storage plans available | Subscription fees; initial backup can take days for large data | Business users; disaster recovery |
| Cloning (Disk Utility, Carbon Copy Cloner) | Creates bootable copy; fast recovery; mirrors entire drive | Manual process; requires large external storage | Advanced users; system migrations |
| Hybrid (Local + Cloud) | Redundant; protects against local disasters and theft | Setup complexity; higher costs | Users needing maximum protection |
In 2022, Apple reported that over 850 million users relied on iCloud, but only a portion of these users leveraged full-device backups. While Time Machine remains the most popular local solution for Mac users, third-party cloud platforms have grown in popularity due to their resilience against physical disasters like fire or theft.
Step-by-Step Guide: How to Back Up Your Mac Before a Hard Drive Restoration
Properly backing up your Mac requires more than just dragging files to an external drive. Here’s a comprehensive step-by-step process to ensure complete data protection:
1. $1 Start by cleaning up your desktop, downloads, and document folders. Delete unnecessary files so your backup is efficient and storage space isn’t wasted. 2. $1 For most users, a combination of Time Machine and cloud storage is best. For those with specialized needs (like bootable backups), consider disk cloning as well. 3. $1 If using Time Machine or cloning, connect a high-capacity external hard drive (preferably with at least twice the storage space as your Mac’s internal drive). 4. $1 Go to System Preferences > Time Machine, select your external drive, and turn on automatic backups. Time Machine will back up hourly, daily, and weekly versions for maximum protection. 5. $1 Sync important folders to iCloud Drive (System Preferences > Apple ID > iCloud > iCloud Drive) or a third-party service. For large photo or video libraries, consider dedicated cloud storage like Google Drive or Dropbox. 6. $1 Use Disk Utility or software like Carbon Copy Cloner to create an exact, bootable copy of your hard drive. This is invaluable if you need to restore your Mac to a fully functional state quickly. 7. $1 Some applications (like Mail, Photos, or Outlook) may store data outside standard folders. Export mailboxes, save photo libraries, and note down application licenses or settings. 8. $1 Open a few files from your backup drive and cloud storage to ensure they’re accessible and up-to-date. Never assume your backup is successful—always check!According to a 2023 Data Recovery Lab report, nearly 18% of users discovered missing or corrupted files only after attempting a restoration. Always double-check the integrity of your backups before wiping your drive.
What to Back Up: Files and Settings You Shouldn’t Forget
It’s easy to overlook critical data during backup. Beyond your desktop and documents, here’s a checklist of items to include:
- $1 Copy everything from your user folders. - $1 Many users save important files here temporarily. - $1 Frequently contains installers, receipts, and other files. - $1 Back up your Music folder and any custom playlists. - $1 Export mailboxes and contacts from Mail or Outlook. - $1 Many apps store preferences in Library > Preferences. - $1 Export bookmarks and saved passwords from Safari, Chrome, or Firefox. - $1 Backup your Keychain Access (Library > Keychains) for saved passwords. - $1 If you use Parallels, VMware, or VirtualBox, back up VM images. - $1 Save copies of installers and license keys. - $1 If you backup iPhones or iPads to your Mac, preserve these as well (~/Library/Application Support/MobileSync/Backup).Apple’s own support page recommends backing up the /Library and ~/Library folders for comprehensive coverage, especially if you have custom settings or developer files.
Common Backup Mistakes to Avoid Before Mac Hard Drive Restoration
Even with the right tools, many users make critical errors that can compromise their backups:
- $1 Relying solely on cloud sync (like iCloud Drive) may miss files outside synced folders. - $1 Keeping only one backup—especially on-site—leaves you vulnerable to drive failure or theft. - $1 Without a bootable clone or full Time Machine backup, restoring macOS and applications will be much more time-consuming. - $1 Many application and system settings are stored in hidden folders (like ~/Library). - $1 Failing to test your backup can result in discovering missing files after it’s too late.According to a 2021 IDC study, 23% of users who thought they had full backups discovered after a restoration that they were missing key files or settings. Take the time to double-check your backup before starting any restoration.
Restoring Your Mac After Backup: What to Expect
Once you’ve backed up all your data, you’re ready to restore or replace your Mac’s hard drive. Here’s what the process typically involves:
1. $1 Use macOS Recovery (Command + R at startup) to erase your drive and reinstall the operating system. 2. $1 During setup, you’ll be prompted to restore from a Time Machine backup or migrate data from another disk. 3. $1 Not all apps will transfer automatically—plan to reinstall critical software and input license keys as needed. 4. $1 Log into iCloud and other cloud services to sync your latest files. 5. $1 Check that all your documents, photos, emails, and settings are intact. Run your most important applications to ensure preferences and licenses carried over.On average, restoring a Mac from a Time Machine backup takes 1-3 hours, depending on the size of your data and speed of your external drive. Bootable clones can cut this time significantly, allowing you to start working almost immediately.
Final Thoughts on Backing Up Data Before Mac Hard Drive Restoration
Properly backing up your data before a Mac hard drive restoration is a safeguard you can’t afford to ignore. By using a layered approach—combining local and cloud backups, exporting critical application data, and double-checking your backup integrity—you can face restoration with confidence, knowing your files and settings are safe.
As technology evolves, so do backup tools and services, making it easier than ever to protect your digital life. Take time to choose the right backup methods for your needs, and make backup verification part of your routine. With preparation, you’ll not only survive a hard drive restoration—you’ll come back stronger, with all your data intact.