Setting up automatic backups is one of the most important steps any Mac user can take to protect their data. Whether you’re working with irreplaceable family photos, critical business documents, or your favorite music collection, losing files to hardware failure, theft, or accidental deletion is always a risk. Fortunately, Apple has built Time Machine into macOS, making automatic backup straightforward and reliable. But how do you set it up effectively, and what makes Time Machine stand out compared to other options? In this guide, we’ll take a deep dive into setting up automatic backups on your Mac using Time Machine, explore best practices, and help you ensure your data is always safe.
Understanding Time Machine: Apple’s Built-In Backup Solution
Time Machine has been a core feature of macOS since Mac OS X Leopard (2007) and remains the go-to backup tool for millions of users. Its core strength lies in its simplicity and full integration with the operating system. With Time Machine, your Mac automatically creates incremental backups—meaning it saves changes made since the last backup, rather than copying every file each time. This approach is efficient in both time and storage space.
A few key facts about Time Machine:
- Time Machine supports both local backups (to external drives) and network backups (to Time Capsule, network-attached storage, or shared drives). - It keeps hourly backups for the past 24 hours, daily backups for the past month, and weekly backups for all previous months. - You can restore individual files, entire folders, or even your whole system from a Time Machine backup.According to Apple, over 50% of Mac users have enabled Time Machine, and user surveys show that regular backups can reduce the impact of data loss events by up to 90%.
.png)
What You Need Before Setting Up Time Machine
Before launching straight into setup, it’s essential to prepare the right hardware and understand your options. Here are the most common choices for Time Machine backup destinations:
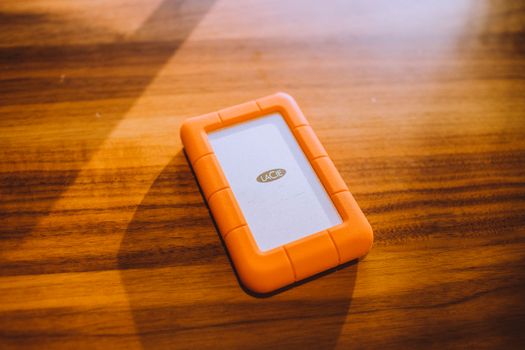
- External USB, Thunderbolt, or FireWire drives: The most straightforward and popular option. Drives from major brands like Seagate, Western Digital, and LaCie are widely used, and you can often find 2TB models for under $70 as of 2024. - Network-attached storage (NAS): For users who want to back up multiple Macs over a network, a compatible NAS device (such as Synology or QNAP) can act as a Time Machine destination. - Apple Time Capsule: While discontinued in 2018, existing units still work reliably for wireless backups. - Shared folders on another Mac: You can designate a folder on another Mac running macOS High Sierra or later as a Time Machine target.Here’s a quick comparison of backup destination types:
| Backup Destination | Connection Type | Setup Complexity | Ideal For | Current Availability |
|---|---|---|---|---|
| External Hard Drive | USB/Thunderbolt/FireWire | Very Easy | Most users, portability | Widely available |
| NAS Device | Ethernet/Wi-Fi | Moderate | Multiple Macs, remote access | Widely available |
| Time Capsule | Wi-Fi/Ethernet | Easy | Wireless, older setups | Discontinued, used market |
| Shared Mac Folder | Network | Moderate | Households with several Macs | Requires additional Mac |
Make sure your chosen drive or device is empty or contains only data you are willing to erase. Time Machine will reformat most external drives to the APFS or HFS+ file system for best results.
Step-by-Step: How to Set Up Automatic Backup with Time Machine
Setting up Time Machine is simple, but following each step ensures your backup is configured for reliability and ease of restoration.
1. $1 Plug your external hard drive into your Mac via USB, Thunderbolt, or FireWire. If you’re using a NAS device or networked Mac, make sure it’s powered on and accessible. 2. $1 If your Mac prompts you to use the drive for backups, click “Use as Backup Disk.” If not, go to Disk Utility (Applications > Utilities > Disk Utility), select your drive, and erase it using the APFS or Mac OS Extended (Journaled) format. 3. $1 Click the Apple menu, select “System Settings” (macOS Ventura or later) or “System Preferences” (earlier versions), then find “Time Machine.” 4. $1 Click “Add Backup Disk” or “Select Disk,” choose your drive or network location, and authenticate if prompted. 5. $1 Make sure the “Back Up Automatically” checkbox is enabled. Time Machine will now start making hourly backups. 6. $1 Click “Options” to add folders you want Time Machine to ignore. This can save space if you have temporary files or large media folders you don’t need to back up.The first backup can take several hours, depending on the amount of data and the connection speed (USB 3.0 can transfer up to 5 Gbps, while Thunderbolt 3 reaches up to 40 Gbps). Subsequent backups are much faster, as only changed files are saved.
Best Practices for Reliable Automatic Backups
While Time Machine is designed to be hands-off, a few best practices can make your backups even more reliable and effective:
- $1 For automatic hourly backups, keep your drive plugged in as often as possible. If you use a portable Mac, connect the backup disk at least once a day. - $1 Time Machine allows you to rotate between several drives. This protects you in case one backup disk fails or is lost. According to Backblaze’s 2023 Drive Stats, about 1.4% of hard drives fail within their first year, so redundancy is wise. - $1 Keep at least one backup drive in a different physical location (home and office, for example) to protect against theft or disasters. - $1 Occasionally check the Time Machine menu bar icon—green means everything is working, while a red exclamation indicates an issue. - $1 At least once a year, use Time Machine’s “Enter Time Machine” feature to restore a file or folder and make sure your backup is functioning as expected.Restoring Data and Using Time Machine Efficiently
The real value of a backup system is in its ability to restore data when needed. Time Machine makes this process user-friendly:
- $1 Click the Time Machine icon in the menu bar and select “Enter Time Machine.” Navigate through your backup timeline, select the item to restore, and click “Restore.” - $1 If your Mac’s internal drive fails, use macOS Recovery (press Command + R at startup) and select “Restore from Time Machine Backup.” You can return your Mac to exactly how it was at your last backup. - $1 When setting up a new Mac, Migration Assistant can transfer your apps, settings, and files directly from a Time Machine backup.According to Apple, restoring an entire Mac takes between 30 minutes and several hours, depending on backup size and connection speed.
Time Machine vs. Other Mac Backup Options
While Time Machine is the default choice, it’s not the only way to back up your Mac. Here’s how it compares to some alternatives:
- $1 These make exact, bootable copies of your drive. Useful for rapid disaster recovery, but often less flexible for restoring individual files from different points in time. - $1 These store your files offsite, protecting against local disasters. However, uploads can be slow and most services charge monthly. - $1 Copying files to an external drive is simple but easy to forget and prone to human error.Here’s a quick comparison:
| Backup Method | Automatic | Restores Old Versions | Offsite Option | Bootable Backup | Cost |
|---|---|---|---|---|---|
| Time Machine | Yes | Yes | No (unless drive is stored offsite) | No | Free (with hardware) |
| Cloning Apps | Yes | Limited | No | Yes | Paid (one-time) |
| Cloud Backup | Yes | Yes | Yes | No | Paid (monthly/yearly) |
| Manual Backup | No | No | No | No | Free |
For most users, combining Time Machine with an occasional cloud backup offers the best blend of convenience and disaster protection.
Final Thoughts on Setting Up Automatic Backup on a Mac with Time Machine
Automatic backups are the safety net every Mac user needs, and Time Machine makes the process remarkably simple. By following the steps outlined above, you can ensure that your files, photos, apps, and settings are protected against unexpected data loss. Remember, the best backup is the one that happens automatically—so set it up once, check on it occasionally, and let your Mac take care of the rest. In the digital age, peace of mind is only a backup away.