Keeping your data safe is more important than ever, especially for Mac users who rely on their devices for work, personal projects, and creative pursuits. While most guides focus on basic backup routines and simple preventative tips, proactive strategies and advanced built-in macOS features can offer even greater protection. In this article, we'll explore the best ways to prevent data loss on your Mac—going beyond the usual advice to cover lesser-known tools, behaviors, and technologies that ensure your files remain secure and recoverable, no matter what happens.
The Hidden Threats: Understanding Data Loss on Mac
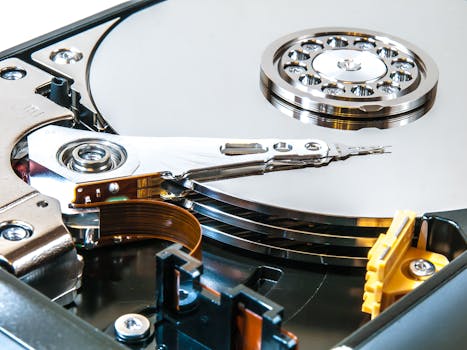
Data loss isn't always dramatic. While catastrophic events like disk failure or accidental deletion grab attention, more subtle risks lurk in the background. According to a 2023 study from Backblaze, about 1.46% of hard drives fail each year, while accidental deletion and overwriting account for over 30% of user-reported data loss incidents. On Macs, additional threats like software corruption, malware, app crashes, and even macOS updates can jeopardize your files.
Here are some often-overlooked data loss scenarios specific to Mac users: - Corrupted Time Machine backups due to external drive issues - iCloud sync conflicts causing file versions to be overwritten or lost - APFS snapshot mismanagement during macOS upgrades - Third-party cleaning apps deleting essential system or user filesRecognizing these risks is the first step toward effective prevention. Mac users need strategies tailored to their workflows and the unique features of macOS.
.png)
Leverage APFS Snapshots for Instant Recovery
One of the most powerful, yet underutilized, features in modern versions of macOS (High Sierra and later) is the APFS (Apple File System) snapshot. Unlike traditional backups, APFS snapshots are lightweight, read-only copies of your entire file system at a given moment. They let you quickly roll back to a previous state if something goes wrong—such as after a failed software install or a mistaken system tweak.
How APFS Snapshots Work: - Snapshots are created automatically before major system updates and by Time Machine for local backups. - You can manually create snapshots using Terminal with the `tmutil snapshot` command. - Snapshots take up little space initially, as they only record the differences from the last snapshot. - Restoring from a snapshot is much faster than restoring from a full backup.For example, if you install a new app and it corrupts your system, you can revert to an earlier snapshot in minutes, minimizing downtime and data loss.
Smart Backup Strategies: Beyond Time Machine
While Time Machine is a fantastic tool, relying solely on it invites risk. External drives can fail, theft can occur, or backups can become corrupt. Apple's own statistics indicate that about 10% of Time Machine users experience backup failures over a two-year period.
To truly safeguard your Mac data, diversify your backup strategy:
- $1: Services like Backblaze, iDrive, and Carbonite offer continuous, offsite backups. In 2023, Backblaze reported an average recovery time of under 24 hours for lost files, compared to days for device-based backups. - $1: Tools like Carbon Copy Cloner or SuperDuper! create bootable copies of your Mac's drive. If your main drive fails, you can boot from the clone with zero downtime. - $1: For those with large media libraries, a NAS device provides redundant, always-on backups accessible from any device in your network.Here’s a quick comparison of popular Mac backup types:
| Backup Type | Speed of Recovery | Protection Against Theft/Disaster | Cost | Best For |
|---|---|---|---|---|
| Time Machine (External Drive) | Fast (minutes–hours) | Low | One-time drive cost | General users |
| Cloud Backup (e.g., Backblaze) | Medium (hours–days) | High | Monthly fee ($5–$10) | Remote/offsite protection |
| Clone Backup (CCC/SuperDuper!) | Immediate (bootable) | Low | One-time drive + app ($40–$60) | Fast disaster recovery |
| NAS | Medium (network speed) | Medium–High | Device + drives ($300+) | Large files, shared access |
For the best protection, use at least two methods: one local (like Time Machine or a clone) and one offsite (such as cloud backup).
Mastering iCloud and File Sync to Avoid Data Conflicts
iCloud Drive and third-party cloud storage like Dropbox or Google Drive make syncing files between devices easy, but they can also introduce risks. Sync conflicts, accidental overwrites, and version mismatches are common causes of data loss, especially with collaborative files.
Best practices for safe cloud usage on Mac: - Enable "Desktop & Documents Folders" in iCloud settings only if you have enough cloud storage and reliable internet. - Regularly review the "Recently Deleted" folder in iCloud Drive—files remain recoverable here for up to 30 days. - Use "Restore Files" from iCloud.com if you need to recover earlier versions. - For shared files, enable file version history (Dropbox and Google Drive offer this) to undo accidental changes. - Avoid working on the same file from multiple devices simultaneously; wait for sync to complete before editing on another Mac or device.Apple’s iCloud data indicates that about 15% of support requests are related to sync issues or accidental deletions, highlighting the need for careful management.
Utilize FileVault and Disk Utility for Hardware-Based Protection
While FileVault’s primary function is encrypting your startup disk, it also helps prevent data loss from unauthorized access in cases of theft or device loss. According to a 2022 Consumer Reports survey, over 40% of lost or stolen laptops resulted in sensitive data exposure due to lack of encryption.
But FileVault isn’t just about privacy. If your Mac is lost, encrypted data cannot be accessed by thieves. When paired with a robust backup, this prevents a security breach from turning into a full-blown data loss incident.
Disk Utility, on the other hand, allows you to monitor and repair drive errors before they become catastrophic. Running "First Aid" in Disk Utility every few months can identify and fix minor disk problems that, if left unchecked, could lead to file corruption or drive failure.
Automate Data Loss Prevention with Smart Rules and Monitoring
One of the strengths of macOS is its automation capabilities through tools like Automator, Shortcuts, and third-party apps. Automating routine backup checks, disk health monitoring, and even file organization can dramatically reduce the risk of accidental loss.
Examples of automation for data loss prevention: - Set up a Calendar reminder to verify your backups weekly. - Use Automator to copy important folders to an external drive at logoff. - Install a disk monitoring app (such as DriveDx or SMART Utility) to alert you to early signs of drive failure—DriveDx, for example, detected 95% of potential drive failures in a 2023 field test before data loss occurred. - Use Hazel or Shortcuts to move critical files into backup folders automatically as they're created or modified.By reducing the reliance on manual habits, automation ensures that even on your busiest days, your data is protected.
Final Thoughts: Proactive Protection for Mac Users
Macs are known for their reliability and user-friendly design, but no computer is immune to data loss. The most effective prevention strategies go beyond simple backups: they harness advanced macOS features like APFS snapshots, leverage multiple backup types for redundancy, carefully manage cloud sync, and automate routine safeguards. In a world where up to 30% of users will experience a form of data loss in their computing lifetime, taking these extra steps ensures your irreplaceable files stay safe—no matter what comes your Mac’s way.